
If you are just getting started in your role as a SQL Server DBA, at some point in your career you are going to have to do some work with SQL Server system databases. That is, unless you are reading this in the year 2025 when all databases will be managed bots in the Cumuloverse. For now, though, you can expect that you will at some point need to restore or move a system database. Fortunately, these days it is a pretty straightforward task and by way of example let’s assume you were working late one night installing SQL Server and skipped over the step in the run book to install the system databases on their own drive and they were created in a default folder on the C drive. As it turns out you did not catch this until the system was already in production. Luckily there is a maintenance window coming up, because while the steps are simple, it does require a SQL restart. Below are the steps you will need to take to move MSDB quickly and safely.
1. Preparing for the Move
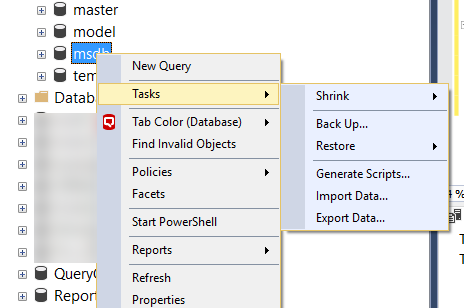
First, you can see that you are not able to detach MSDB or any other system database like you would a user database; is it not a selectable option in SSMS and if you try to detach it with T-SQL you will get an error.
USE [master] GO
EXEC master.dbo.sp_detach_db @dbname = N’MSDB’
GO
Msg 7940, Level 16, State 1, Line 3
System databases master, model, msdb, and tempdb cannot be detached.
The first step in any change to your SQL Server is going to be to make a full backup of the MSDB database. Once that is complete and your safety net is in place, go ahead and open up SQL Server Configuration Manager. There are several other means of stopping SQL Server like “NET STOP MSSQLSERVER” and you are certainly welcome to use this method. Many DBAs are habituated to using SQL Server Configuration Manager to stop and restart SQL Services because it is often the utility that Microsoft recommends to perform this function.
Before you restart the SQL Services, however, we will need to run a few small queries.
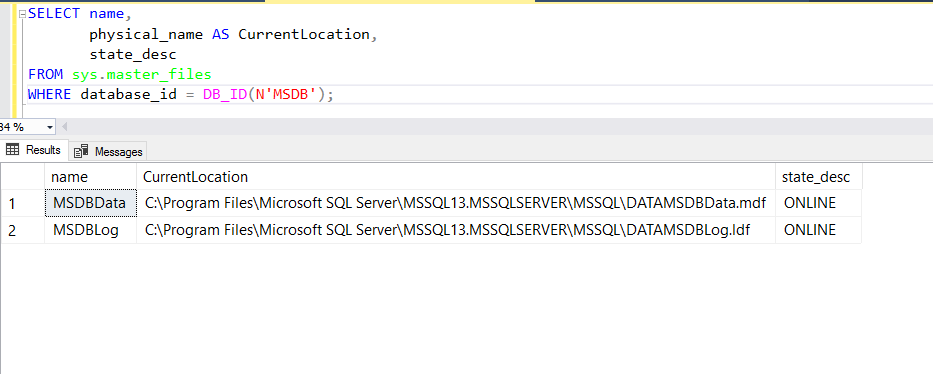
First, let’s take a look at where SQL Server knows the current MSDB data and log files to reside.
SELECT name,
physical_name AS CurrentLocation,
state_desc
FROM sys.master_files
WHERE database_id = DB_ID(N’MSDB’);
We can see that both files are physical in the default installation location on the C drive.
2. Updating SQL Server with the New Location
We want to change this location to be the standard drives and folders where we should have placed them to begin with, E:SQLData and F:SQLLogs.
ALTER DATABASE msdb
MODIFY FILE (NAME = MSDBData, FILENAME = ‘E:SQlDataMSDBData.mdf’);
GO
ALTER DATABASE msdb
MODIFY FILE (NAME = MSDBLog, FILENAME = ‘F:SQLLogsMSDBLog.ldf’);
GO
We will be informed that the location has been successfully changed and that the new path will be used when the database is started.
The file “MSDBData” has been modified in the system catalog. The new path will be used the next time the database is started. The file “MSDBLog” has been modified in the system catalog. The new path will be used the next time the database is started.
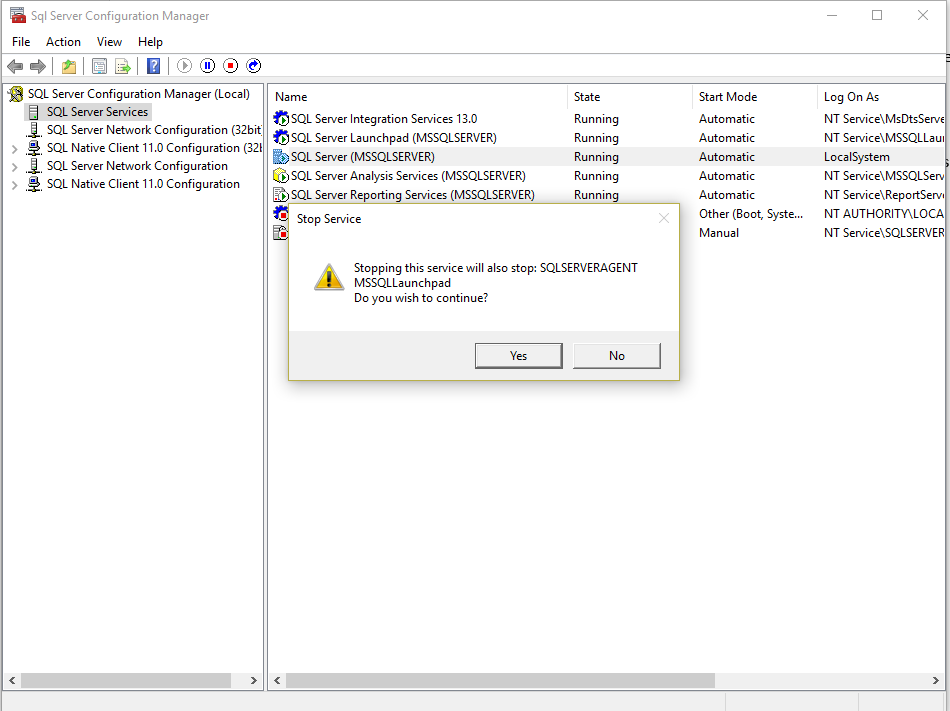
3. Restarting SQL Services
Now all that remains is to stop the SQL Services and copy the files to the new respective locations and restart the SQL Services. You will need to stop the services before you can copy over the files otherwise you will get a message telling you that the files are in use. In SQL Server Configuration Manager, right-click SQL Server and select “Stop”. You will be prompted to also stop SQL Server Agent. Click “Yes”.
If you are a top-shelf DBA like we know you are then you would have already prepared the copy statements to paste into a CMD window. Windows Explorer works just fine, however. Note that we are copying the files, not moving them because if things go wrong we want to keep a copy in the original location. Once the files are copied, start SQL Server and SQL Server Agent in SQL Server Configuration Manager and if all goes well, you will have a green play button on your services icons. Rerun the code that shows the current location and you will see the new file locations.
MSDBData E:SQlDataMSDBData.mdf ONLINE
MSDBLog F:SQLLogsMSDBLog.ldf ONLINE
There are a couple of remaining items to check and that is to make sure the service broker is enabled for MSDB and database mail works, as these are both tied to the MSDB database.
SELECT is_broker_enabled
FROM sys.databases
WHERE name = N’msdb’;
You should see a value of “1” after running the above code.
Next, right click on Database Mail under Management in SSMS and click “Send Test email”, fill in the values and send the mail. If you receive an email, you are good to go.
Because you are thorough and have some time to spare in your maintenance window you will want to make sure that the SQL Agent jobs are running successfully. You can then safely delete the original data and log files from the original location on the C drive.
While this process is simple, there is always a chance that something could go awry; the SQL Agent service may not start, for example or MSDB may be in a “Recovery Pending” state. It is always best to prepare for this kind of move by testing the process out on your test server and be prepared to deal with worst case. Luckily the most common issue is a typo for the new destinations and SQL Server should start regardless, so you can readily fix the issue with the same steps in this article.
Need more help with your MSDB transfer or other SQL Server issues? Get in touch with our database experts for a free database consultation to learn how we can help!